


One of the common issues faced by Linux users when using a VPN is the inability to connect or
frequent disconnections. This issue is often caused by incorrect DNS settings. Changing the
DNS to more reliable and faster servers can help resolve this problem.
Changing System DNS
One of the quickest ways to resolve VPN connection problems is to modify the system’s DNS
settings. Here are two methods you can use:
Method 1:
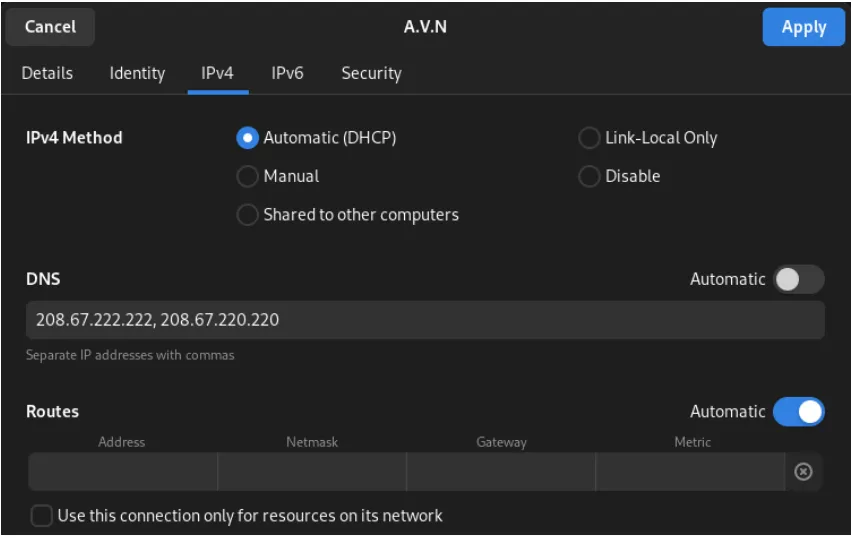
- Go to Settings.
- Navigate to Wi-Fi or your connected network.
- Under the IPv4 settings, disable automatic DNS.
- Enter either Google’s DNS (8.8.8.8) or Cisco’s DNS (208.67.220.220).
Method 2 (Temporary):
- Open the terminal and run the following command:
sudo vi /etc/resolv.conf- In the opened file, manually enter Google’s DNS (8.8.8.8) or Cisco’s DNS
(208.67.220.220).
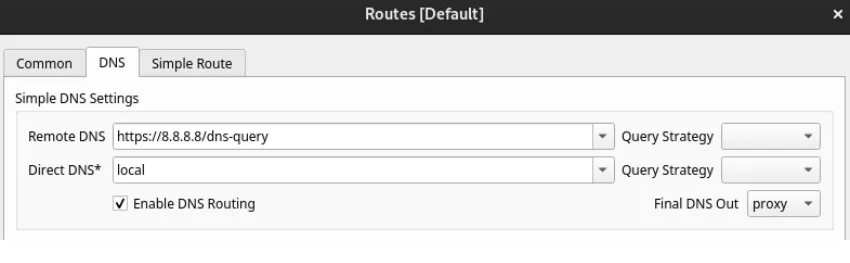
Changing Application DNS
To fix VPN issues directly within your VPN applications, such as Nekoray or Hiddify, follow
these steps:
- Open the application’s settings.
- Locate the DNS settings and input Google’s DNS (8.8.8.8) or Cisco’s DNS
(208.67.220.220).
FoxyProxy Browser Extension | Without Tun Mode
If you are using a browser proxy, FoxyProxy is a convenient extension available for both
Chrome and Firefox.
Download for Chorome
Download for FireFox
To configure the VPN proxy settings:
- Open FoxyProxy
Setting > Proxies - Set the title to
“VPN-Nekoray” - Enter Hostname =
“127.0.0.1"and Port =“2080”(Nekoray Port).
- With this method, there is no need to use Tun Mode of VPN application, just open VPN application and select “VPN-Nekoray” proxy on FoxyProxy.
Using Telegram Proxy
To configure a proxy for Telegram via Nekoray:
- Add a new proxy.
- Select “
SOCKS5” as the proxy type. - Set Hostname = “
127.0.0.1” and Port = “2080”(Nekoray Port)
By following these methods, you can effectively troubleshoot and resolve VPN connectivity
issues on Linux, ensuring a more stable and secure connection.